Launch your own clothing line at under $100,

Design & launch your own clothing line!
Launch Your Own Clothing Line. Custom Made, On-demand!

MyWear® is the only integrated platform to let you launch your own line of apparel or accessories, designed, produced and delivered to order, under your label, with no minimum order quantities. MyWear® provides you with everything you need: design tools, e-commerce, social media integration, manufacturing & drop shipping!

If you are wondering, is talent alone enough?, you need to look at industry legends like Coco Chanel, who learnt the art of sewing while being raised in an orphanage or Georgio Armani, who started his career from a garments shop, where he assisted a photographer in arranging the window, or let’s take the example of Calvin Klein, who started his career as a complete loner, with no connections nor money, except for what he made helping his father at his grocery store.

The simple truth is, in addition to being exceptional fashion designers, these greats were also exceptional business men and women, scouting the market like a hawk, searching for opportunity, flaws, chinks in the armor where they could step in and offer their solutions.

For instance, Rene’ Lacoste designed a game changing shirt with a buttoned neckline and short sleeves in a time when tennis players were accustomed to rolling up their sleeves to get a little relief. Lacoste saw opportunity, stepped in and offered his solution. A simple formula.

These extraordinary people loved their art enough to learn and develop a new line of business. Now, we have made the barriers much lower for an enterprising designer to get started on their own.

Launch your own clothing line

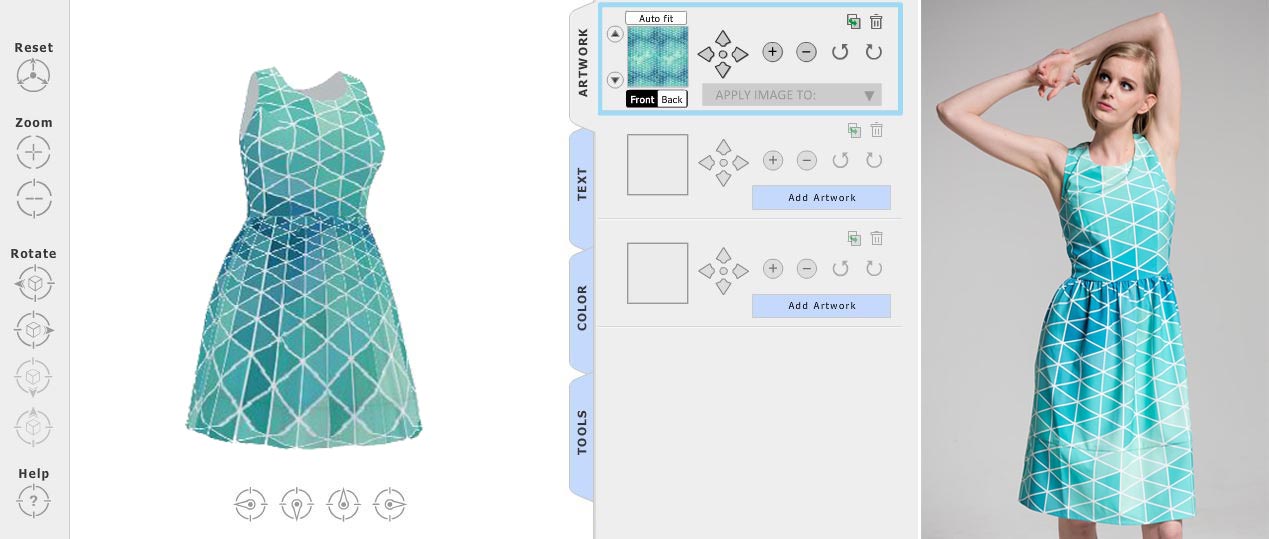
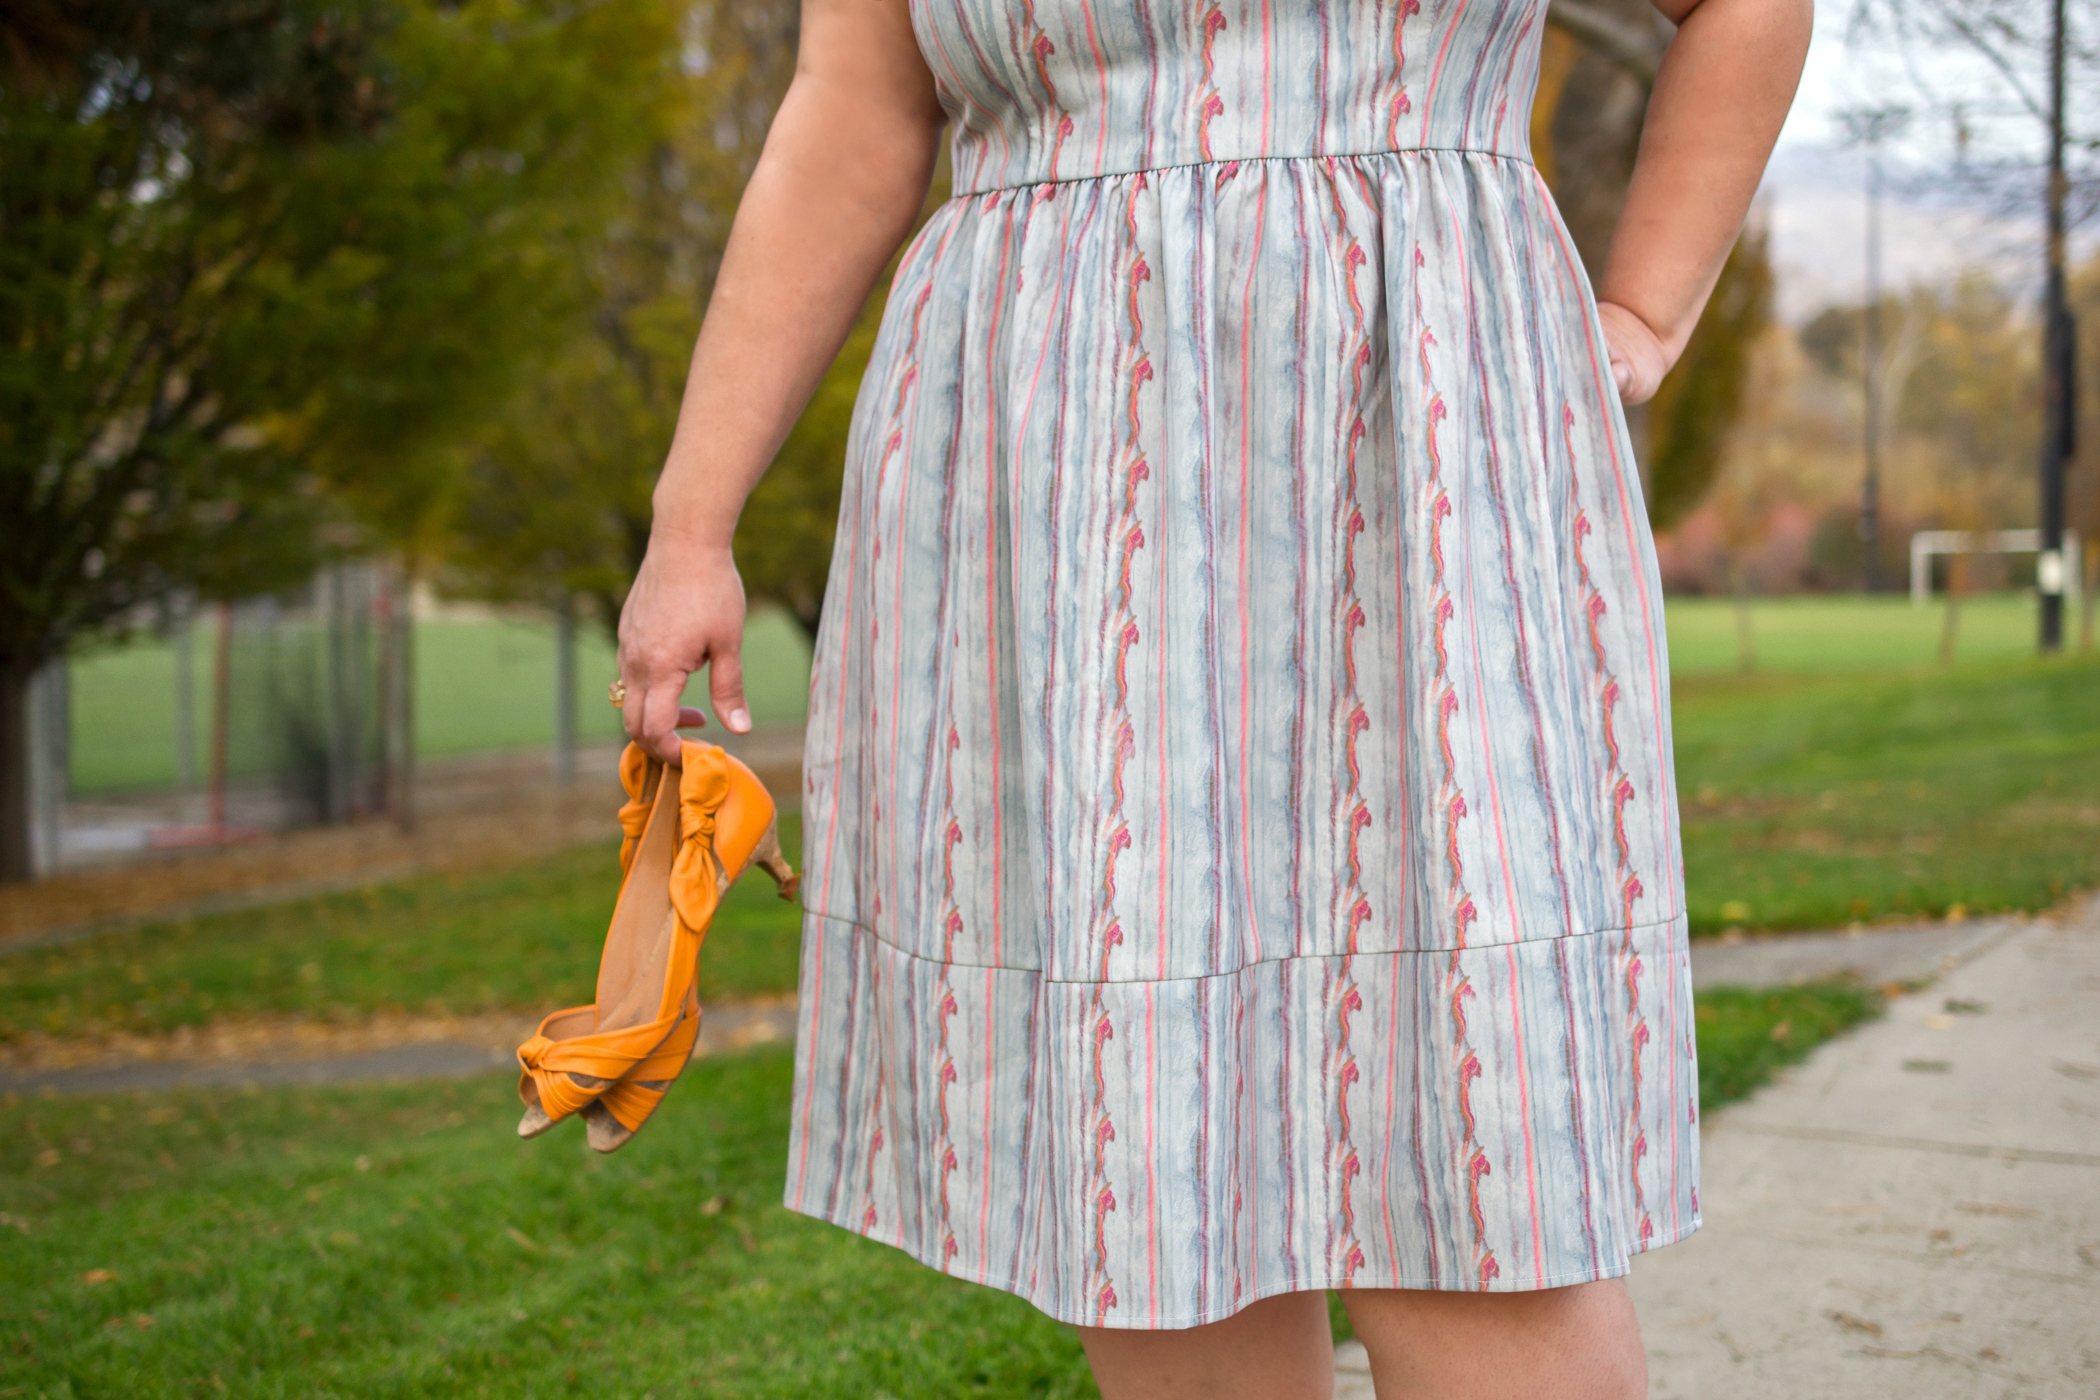
Choose from our wide range of product silhouettes across customer segments – Tees, Tops, Dresses, Backpacks, Messenger bags and Raglans across Kids, Men, Women and Extended Sizes in Synthetic, Cotton, Polyester, Silk or Blends. Just design on our 3D tool and publish to your store and the product is ready for purchase! No inventory, no pre-orders, no minimums – we will custom make and drop ship every single order, under your label, within 2 weeks.

Need your own custom product or special fabric? We will design, pattern-make and set up manufacturing just for you, for a small fee.

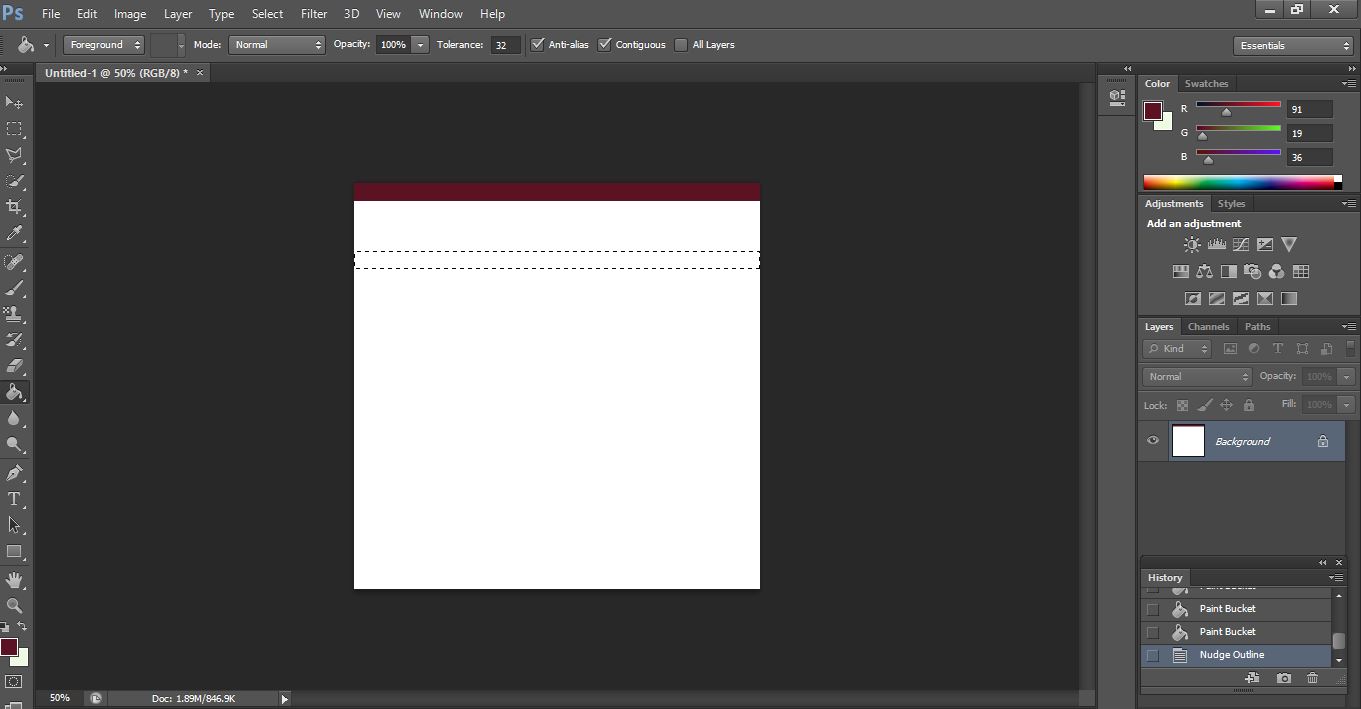
Don’t be restricted to designing inside a box! MyWear® is the only platform that supports full-bleed prints with custom sizes and choice of fabric. Go ahead and unleash your creative skills without any technology limitation.

Promote your products on Facebook, sell on Facebook in-app store, promote on Twitter, Instagram & Pinterest with a single click from our social dashboard. When your customers order on any of your channels, we will manufacture and drop ship it!

Your own Brand Of Apparel!
Launch your line, under your own label.

We have simplified supply chains, built design tools and brought on-demand
manufacturing so any budding designer with talent and entrepreneurial skills can get started. We have made sure tools, technology or cost are no longer a barrier. You just need to add your talent and creativity to the mix!

Register nowhttps://www.launchmywear.com/design-make-sell.html

Save

Save

Move Beyond Shirt Design Software with MyWear’s 3D Product Designer & Manufacturing Platform

Some of you have been curious about this while logging in to design custom clothing and accessories on LaunchMyWear.com:

mywearpage designers decorators manufacturing software

To the left, you’ll find your designer portal. To the right? Meet MyWear Decorators Network. In addition to the artist and designer platform you’re familiar with,  we’ve recently developed a new design and manufacturing software specifically for custom retailers and manufacturers.

This soon-to-be released software has industry-specific solutions that optimize user experience, bring innovative products to market, and drive new business models. MyWear Decorators’ Network provides a single technology platform across the entire manufacturing life cycle, at a very affordable price, so you can focus on running your business without worrying about the technology heavy lifting. Based on years of research, our patented real 3D designer helps customers easily visualize products in real 3D, as they will be manufactured and our manufacturing automation software delivers production ready patterns to create exactly what was visualized!

Create stock designs or publish blanks for your customers to design on. Use our patented design automation tools to design once for multiple sizes, products and styles – a huge saving in time and cost. Get manufacturing ready patterns, not spec sheets. Reduce pre-production costs by up to 90% with automated pattern generation, grading, cross product designer, design corrector and more! Let your customers design or personalize in real 3D on the web, take a photo and design on a mobile or personalize with a Facebook app. Fully managed e-commerce, social commerce, payment processing and production management.

3d model product design software mywear decorators network

With MyWear Decorators’ Network you have access to industry specific tools like:

MyWear - 3D Visual Designer 3D Visual Designer

Collaborate closely with your customers. Design and communicate in real 3D. Download production-ready patterns.

MyWear - Production Management Production Management

Get manufacturing-ready patterns, not spec sheets. Automated pattern generation, grading, cross product designer, design corrector and more!

MyWear - Quick Product Setup Quick Product Setup. Simple design tools

Offer customers pre-made designs or a blank canvas. Easy to use, intuitive 3D design controls for your designers and customers. Design once for multiple sizes and products!

MyWear - Mobile & Social Apps Mobile & Social Apps

Let customer’s design and order from their mobile, using the camera integrated 3D app! Sell on Facebook with an integrated marketplace app.

MyWear - Complete E-Commerce Complete Commerce

E-Commerce, Social Commerce, Payments & Order Management.

MyWear - Broadest Product Coverage Broadest Product Coverage

Full bleed, cut & sew apparel, bags, accessories, hard goods, shoes, skateboards or car wraps – we got you covered!

Want to see more? Email Sales@LaunchMyWear.com for details or to schedule a demo!

Save

Save

Save

Save

Save

Save

Save

Save

Save

Save

Save

Save

Save

Are You Taking Advantage of These MyWear® Tools?

Now that you’ve familiarized yourself with the MyWear platform and designed your first item, you might be wondering if there’s any hacks or tools for even more control during the design process. Lucky for you, there is! Here we’ll walk you through some of the lesser known tools to utilize while designing with MyWear!

apply image to tool launchmywearApply Image To

If you only want to apply art to specific sections of your design, use the “Apply Image To” dropdown to add art to desired panels, or uncheck components where you don’t want your art to be applied.


artwork tabs hereAdditional Artwork Tabs

If you’re planning on using more than one artwork on your piece, you can use the additional artwork tabs to do so. When combined with “apply image to” you can create pieces that feature multiple works of art on different sections, or it can be used as a tool for even more control over the placement of your art and how it will look on your garment.


clone here tool launchmywearClone Tool

Use the clone tool to clone your art to a second (or third!) artwork tab.


Center Arrow Button

As you’ve probably figured out, the four arrows located in the artwork tab will align your art further to the left or right, or higher or lower. But, there’s also a small center button which will make your arrows move in smaller increments.


display orderDisplay Order

Use the layer up/down buttons located to the left of your art thumbnail to change layer order.

To set a logo, use a .png file (without a background) and overlay it on top of the other layers.


Color Tab

To apply solid color, go to the color tab and uncheck “art” in the component you’d like to apply color to. Click the color box and use the dropper to choose a color or enter a color hex code.

color tab launchmywear

Mirror & Copy Functions

You can also find the “mirror” and “copy” functions located in the color tab. Use these to copy or mirror the art from one side onto the other. For example, for symmetrical sleeves, use the color tab’s dropdown menu under “Mirror” and select “Mirror” to make the left component match with the right. Select “Copy” to apply an identical copy of the art onto the other sleeve.

mirror and copy sides on launchmywear

Once you get the hang of these tools, you’ll find many inventive ways to use them to create truly unique items that your customers can’t find anywhere else. Want a quick visual refresher course? Look no further than our video tutorial!

MyWear® Store Facebook App Lets You Sell Directly on Facebook for Free

Great news for those of you looking to increase your store’s exposure! MyWear has released its new Facebook app! Now, with our new app,  you can add a MyWearStore “Shop” tab to your Facebook page, where anyone visiting your page can see a catalog of your products, view the details, and shop from Facebook! We’ll receive, process, and ship the product and credit your dues, as always. 

Facebook store creating shop on facebook shop

To install, login to your account on LaunchMyWear.com and click on the Facebook cart (top right).

how to install fb app installing facebook store app
You’ll be taken to the MyWear® Store Facebook App page. Click on “Setup your Facebook store”

2nd step fb app adding facebook app steps

From here, select which page you’d like your store to appear on and click “Add Page Tab”.

3 fb app
That’s it! Go checkout your new MyWearStore, right on your Facebook page.

LaunchMyWear How-To: Create a Tribal Print

In this week’s MyWear® How-To, I’ll walk you through creating your own tribal print. To do this, you’ll need Photoshop and a little creativity. Easy peasy!

photoshop paint tribal print how to

Start by using the rectangular marquee tool, located on your tool bar to your left, to create a couple of lines. Fill them in with the desired color using the paint bucket, also located in your tool bar.

1 step 1 lines photoshop how to

Use the polygonal Lasso Tool to begin shaping out an angular design. To do this click corners and the polygonal lasso will connect them with lines. You’ll be using this tool a lot for this particular design, so I recommend playing around with it for a few moments to get a good feel for it.

2 polylasso prefill

Once you’ve created a shape, fill it in with the desired color.

3 pollylasso post fill tribal print how to

Add an additional color, if desired.

4 fill in second color

Create more space for expanding your design by lengthening the canvas size. To do this, go to “Image” on the Menu Bar, then “Canvas Size”, and shift the anchor to one side. Enter a larger number in the Width box.

5 canvas tool photoshop making tribal print how to

To repeat a design, use the rectangular marquee tool to select area you’d like to repeat. Copy and paste (Ctrl+C, Ctrl+V) and use cursor arrows to move the desired spot.

6 keep going

Continue creating a design using your Polygonal Lasso Tool and filling it with the Paint Bucket tool, adding additional colors as you go.

7. tribal coming along

From here, it is really just a matter of creating, copying, and pasting, and adding to your design.

copy and paste tribal print

Here’s my final pattern:

pattern tribal

From here, you can either save and upload to LaunchMyWear or you can add texture. To do this, Go to “Filter” on your Menu Bar and dropdown to select “Oil Paint”. Move around the dials and up the “shine” until you achieve desired effect.

8 painting tribal print

Now you’ve created a one-of-a-kind tribal print ready to be uploaded to LaunchMyWear and turned into an awesome piece of clothing or accessory. Have fun and remember to tweet your designs to @LaunchMyWear.

Final red tribal print for blog

Turn Art into Merchandise and sell with MyWear®!


comme le feu my wear print to plus dress

Register for your free account at http://www.LaunchMyWear.com. After you’ve signed up, you’re ready to create your first piece! Follow along for the steps and helpful tips I’ve learned when designing products.

  1. First, you’ll want to upload your artwork. I usually create my art in Photoshop, but you could also use Microsoft Paint, Adobe Illustrator, a photograph, or a picture of something you’ve drawn/painted. I recommend uploading 300 pixel/inch resolution, so your artwork is large and high-res enough to cover your design in full. The one I uploaded here is 4000×6303 px and 19.4 MB.

mywear upload art step 1

  1. Hover your mouse over the art you uploaded and select “Design your own”. This will take you to a menu of products to choose from. I’ve selected the Plus Size Fit & Flare.

select design your own step 2

  1. Now, we get to the fun stuff! When your design first appears on your product, it will show as a rectangle, one that most likely doesn’t fit the entire piece. There’s an Auto Fit button which will automatically fill the entire product.

fitting artwork on product step 3

4. Or, in order to get your print to cover your product entirely, you’ll want to use the plus sign to scale the art to the whole piece. Use the arrows to align it further to the left or right. To make the print smaller, use the minus option. If you’re planning on using more than one artwork on your piece, you can use the additional artwork tabs to do so.

adding more art selecting different ares step 5

5. To apply color, select the area of your product you’d like to fill and turn artwork off in the color tab, if needed. Choose the color you’d like to apply to the selected section.

step 6 applying color

6. Now your design is up and available for purchase on your MyWear® store! Share your newly designed piece with family, friends, and your social media audience! When an order is placed, we’ll manufacture and ship it, and credit your dues to your account.

launchmywear comme le feu plus size dress

3D tool to design full bleed printed merchandise

At LaunchMyWear.com we offer you a 3D tool to design apparels and accessories with full bleed prints. For example, you can design a custom hoodie, with running designs or patterns that cross over from the body to the sleeve. The artworks designed on the hoodie are not restricted to just the front or back but the entire product. Our unique technology ensures that the finished product matches with the design on the 3D model almost exactly.

Img_1

While designing, you can view your work in 360 degrees on the 3D model by rotating the model.

Img_2

One design many SKUs including Custom sizes

On the consumer facing portal of yours, we let the consumer choose his/her custom size apart from the regular sizes. Adding to the ease, you need not design for different sizes. Our patent pending software generates the design done on the 3D tool and makes patterns automatically for different sizes. This saves up your time to focus on new designs.

One artwork many products:

Using only one artwork you can easily publish various products such as backpacks, T-shirts, hoodies and more. This would help you to create a lookbook for your consumers.

Complete flexibility to place artwork, text and color:

You will find various navigational buttons to place your artwork anywhere on the product. You may expand or contract the artwork using scale in and scale out buttons, rotate the artwork in both anti-clock wise and clock wise directions and select the autofit option which would intelligently autofit your artwork to the entire chosen product. You can choose the section where you want the image through “apply image to” button.

Other functionalities like clone and mirror image:

Using the clone functionality the artwork gets copied from one layer to another layer without requiring you to upload it again. For example, you may copy the artwork from front to back or from right to left side of the product and work on the cloned artwork in a different way compared to the original artwork. It just happens with the click of a button.

If you want to place a mirror image on the opposite section with perfect alignment, the mirror image option comes in handy. The mirror button creates a mirror image of the artwork and the artwork gets applied to the opposite section. This would be useful when you want to place the mirrored artwork from front to back or from right to left without re-doing it all over again.

There is no restriction to turn your creativity to merchandise. Imagination is the only limit. You may register at LaunchMyWear.com and bring your creativity to life.